RadioBOSS Cloud – Quick Start Guide
 Watch this guide on YouTube
RadioBOSS Cloud is a self-contained system. It has everything needed to run a radio station without external dependencies: an AutoDJ with track selection rules and a scheduler, a streaming server, music file storage, and a simple and fully customizable radio station page with various widgets.
Here are a few easy steps to get your radio station online with RadioBOSS Cloud.
To start, log in to the control panel – you should have received an email with login details. Please see our Plans page if you don’t have a RadioBOSS Cloud account and want to open one.
1. Basic configuration
Select “Settings” on the left menu. On the General tab, change the user interface language if needed (English, Spanish, and others are supported). Then, set the Time Zone. This will be handy for scheduling events according to your local time.
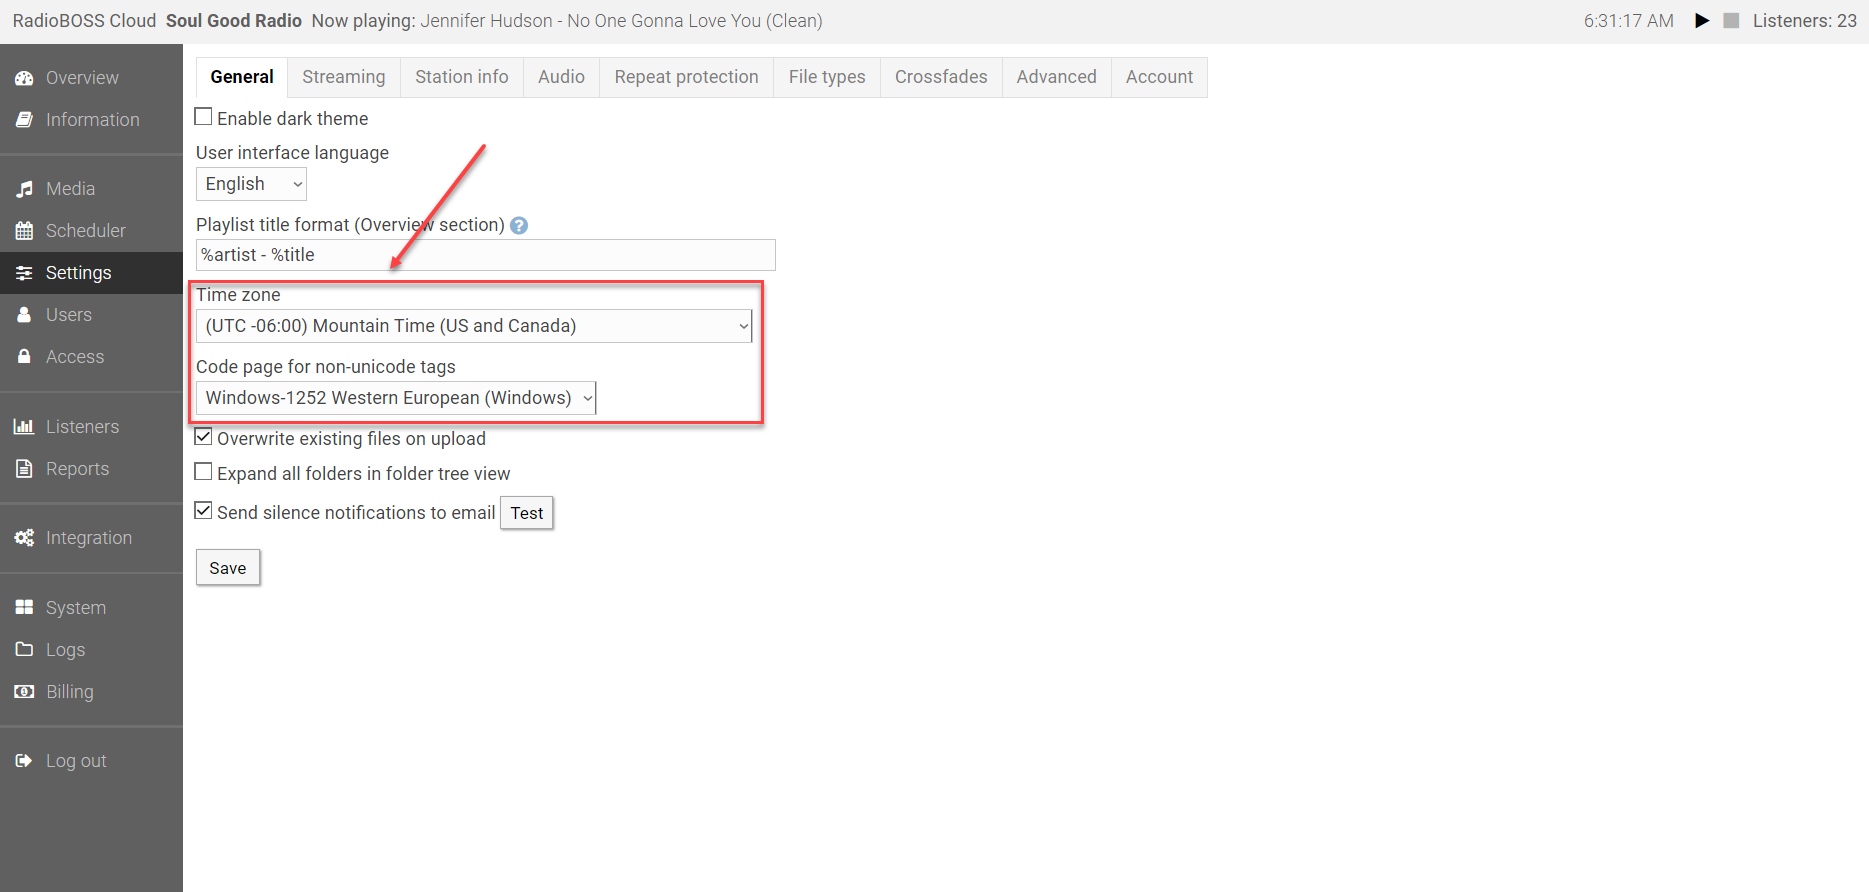
Optionally, set the code page for non-unicode tags to ensure it reads tags correctly for all music files. You can change the code page later at any time. If you see some tracks with names that do not appear correctly, select another code page and click the “Update tracks library” button (in the Media section).
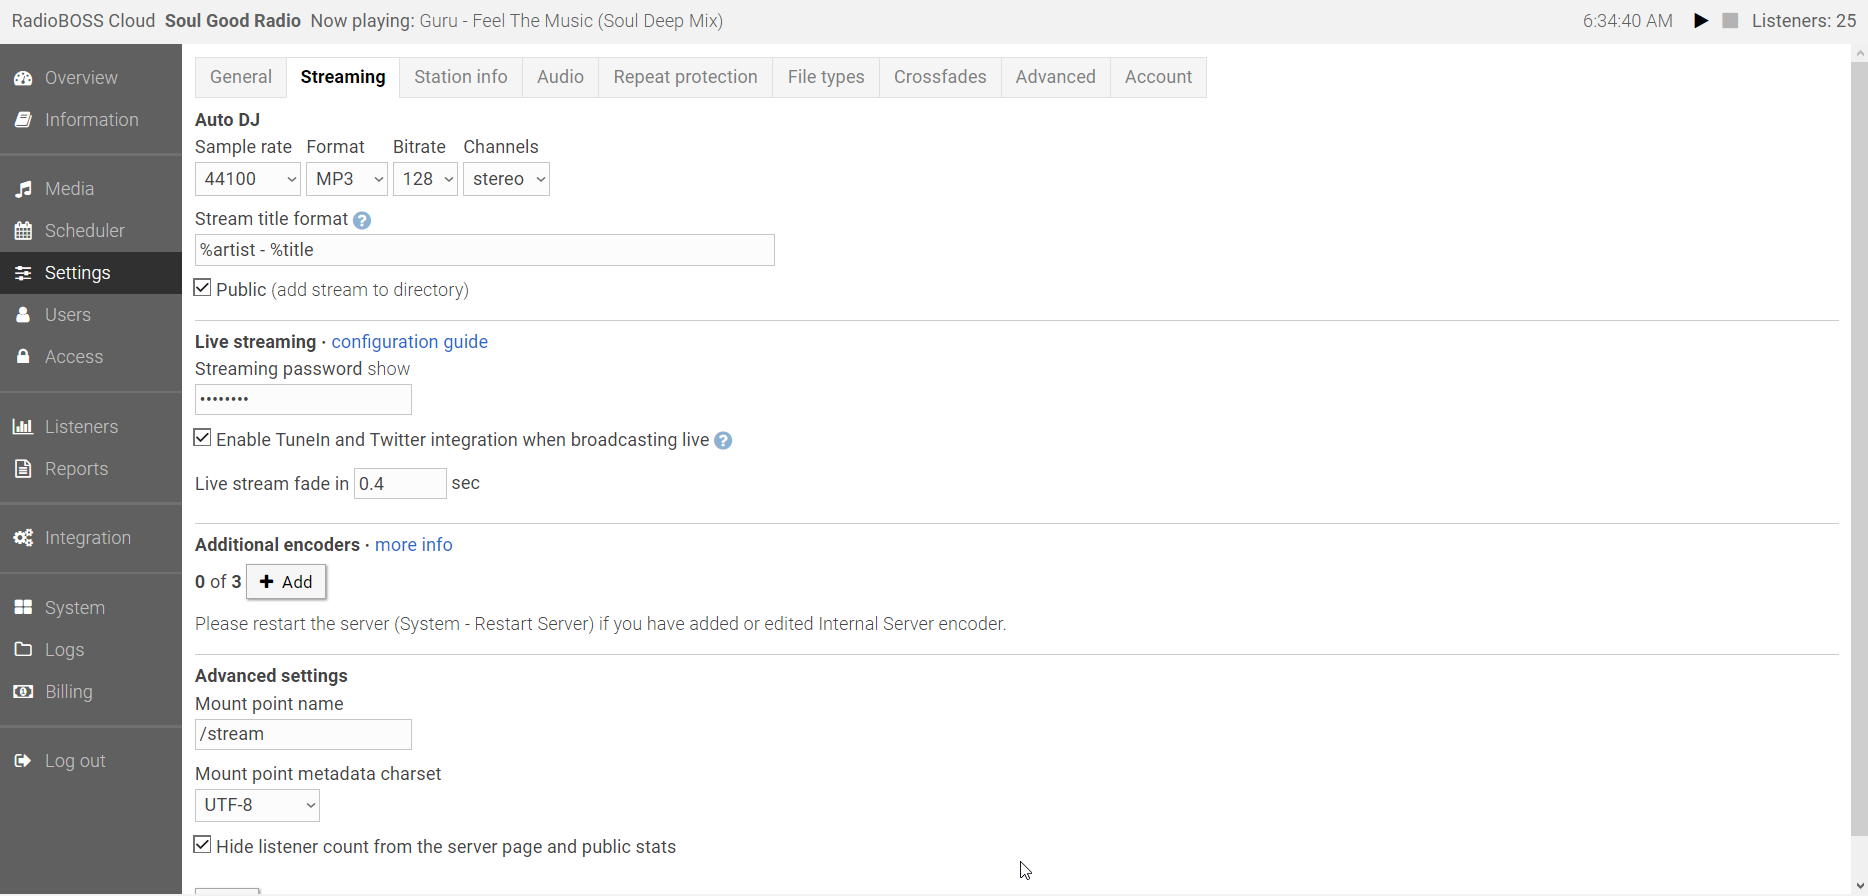
The streaming format is MP3, 128kbps, by default. You can change this in the “Streaming” tab.
On the “Station Info” tab, you can set the station name, genre, URL, and other settings. You can also upload the default cover art, which will be used to display cover art for tracks that do not have cover art information.
Click the “Save” button to save the settings.
2. Upload music.
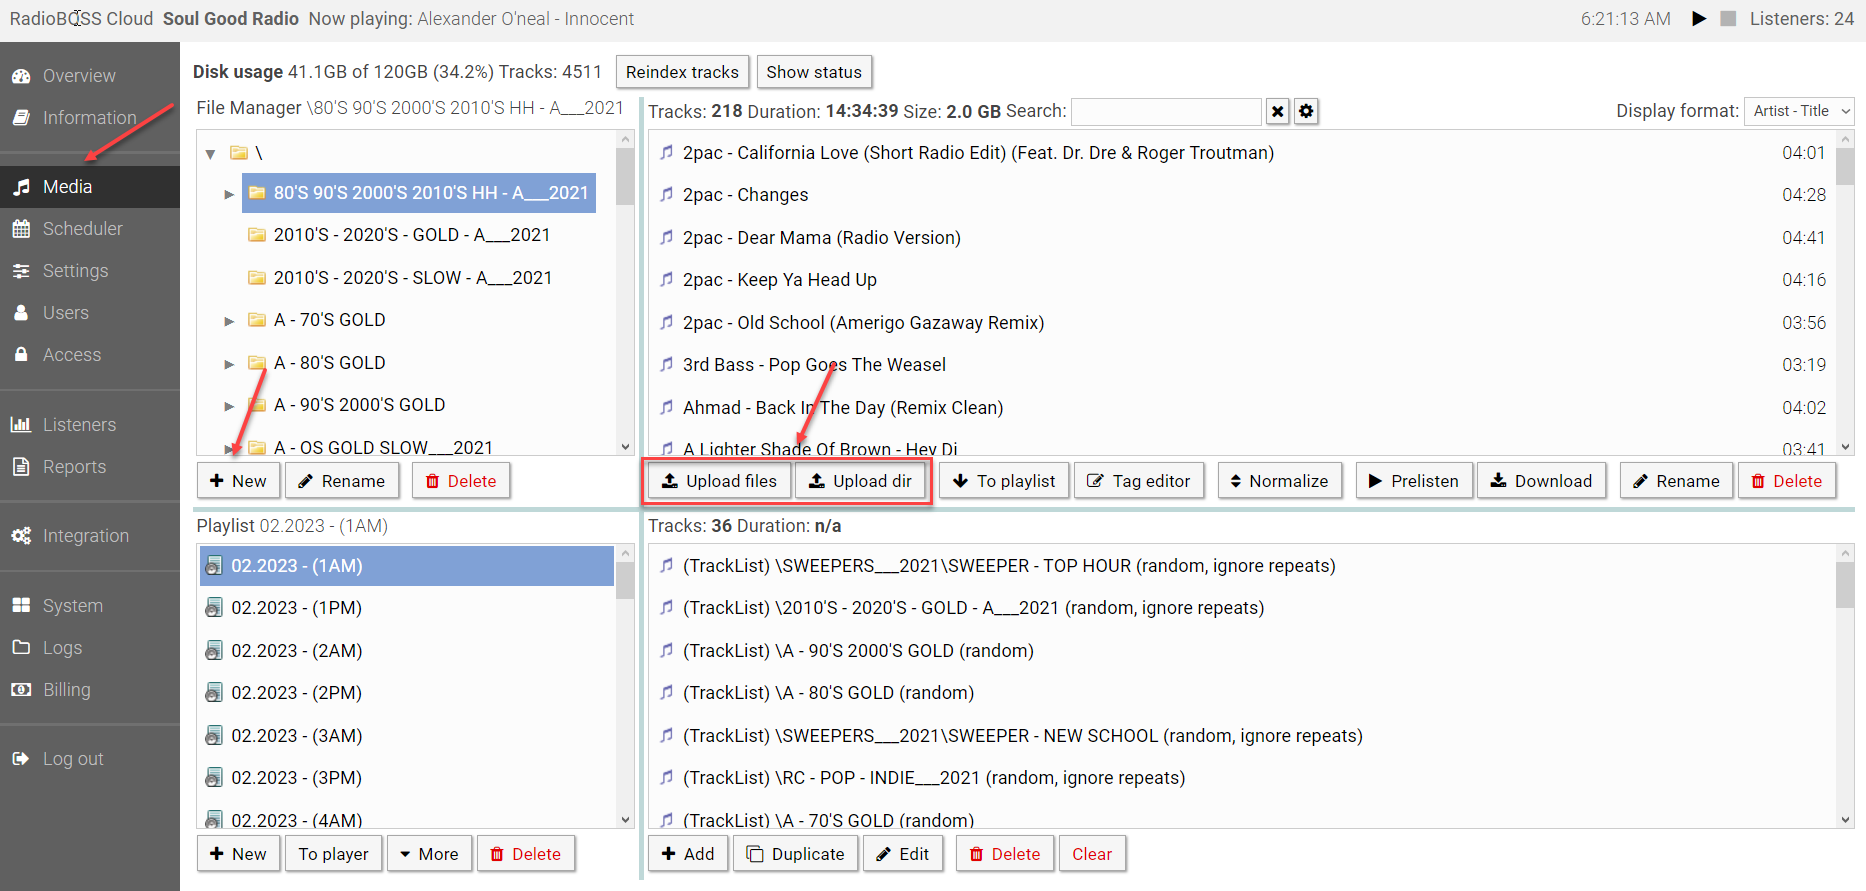
Select “Media” on the left menu. Create the necessary folders using the “New” button under the folder list. We recommend organizing a folder structure where music, station IDs, adverts, heavy rotation tracks, etc. are all in separate folders.
Select the folder where you want to upload the files and use the “Upload files” button to upload one or multiple files. You can also drag-n-drop files from your computer folders into the files list to upload them.
3. Set up the rotation.
Once music files are uploaded, you should set up a rotation.
In the Media section, select the playlist you want to modify (the default “Playlist” or create a new one using the “New” button).
The example shows how to build a simple rotation when it selects, e.g., two files from one folder, then selects one or more files from another folder, mixed with station IDs. An example rotation:
- Two regular tracks
- Station ID
- One Top-100 track
- Station ID
To build such a rotation, use the “Add” button to add items to the playlist. Playlists can contain various types of items: music tracks, network streams (to relay other network streams), or Track Lists (a special feature used to select one track from the folder).
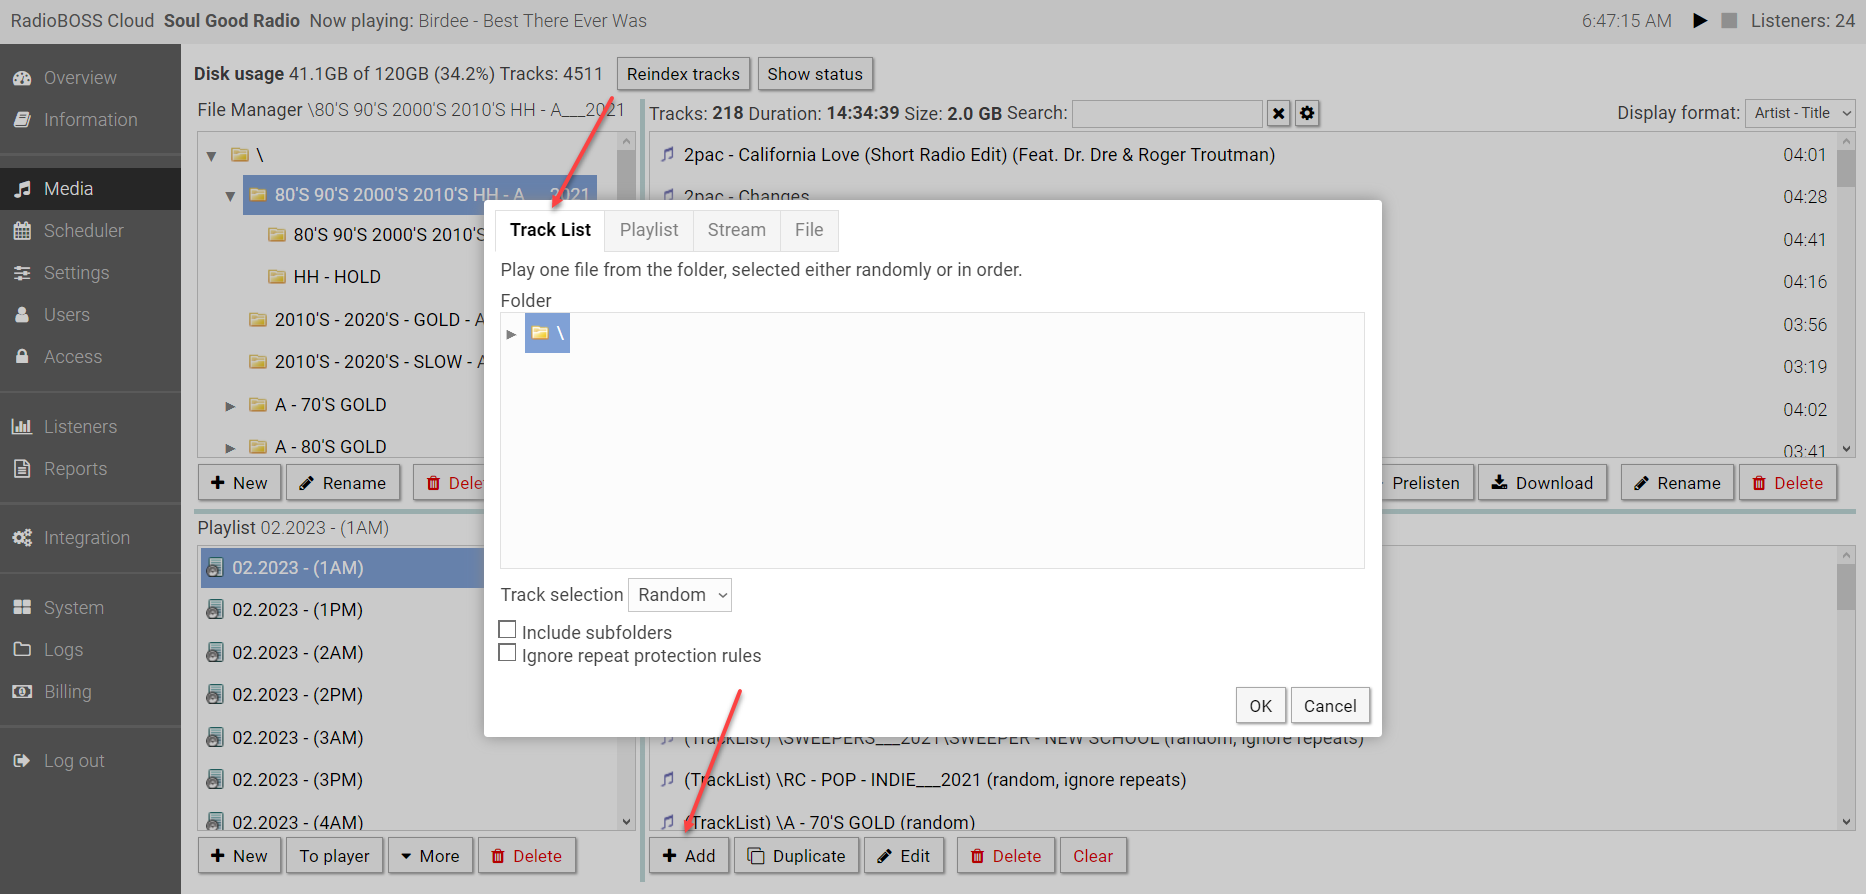
- Use the “Add” button, select “Track List” at the top, and select the folder where you have regular music tracks. Check the “Include subfolders” option if you want to also include tracks in all subfolders.
- Repeat step one to make it select the second track. This will allow it to select two “regular music” tracks in a row.
- To add a station ID, use the “Add” button and select the folder where the station IDs are located. It is recommended to turn on the “Ignore repeat protection rules” because repeat protection rules should not be used for those.
- Add a Top-100 track: Click the “Add” button. This is similar to step one, except this time, you select another folder where the Top-100 music tracks are located.
- Add another station ID, which is the same as step three.
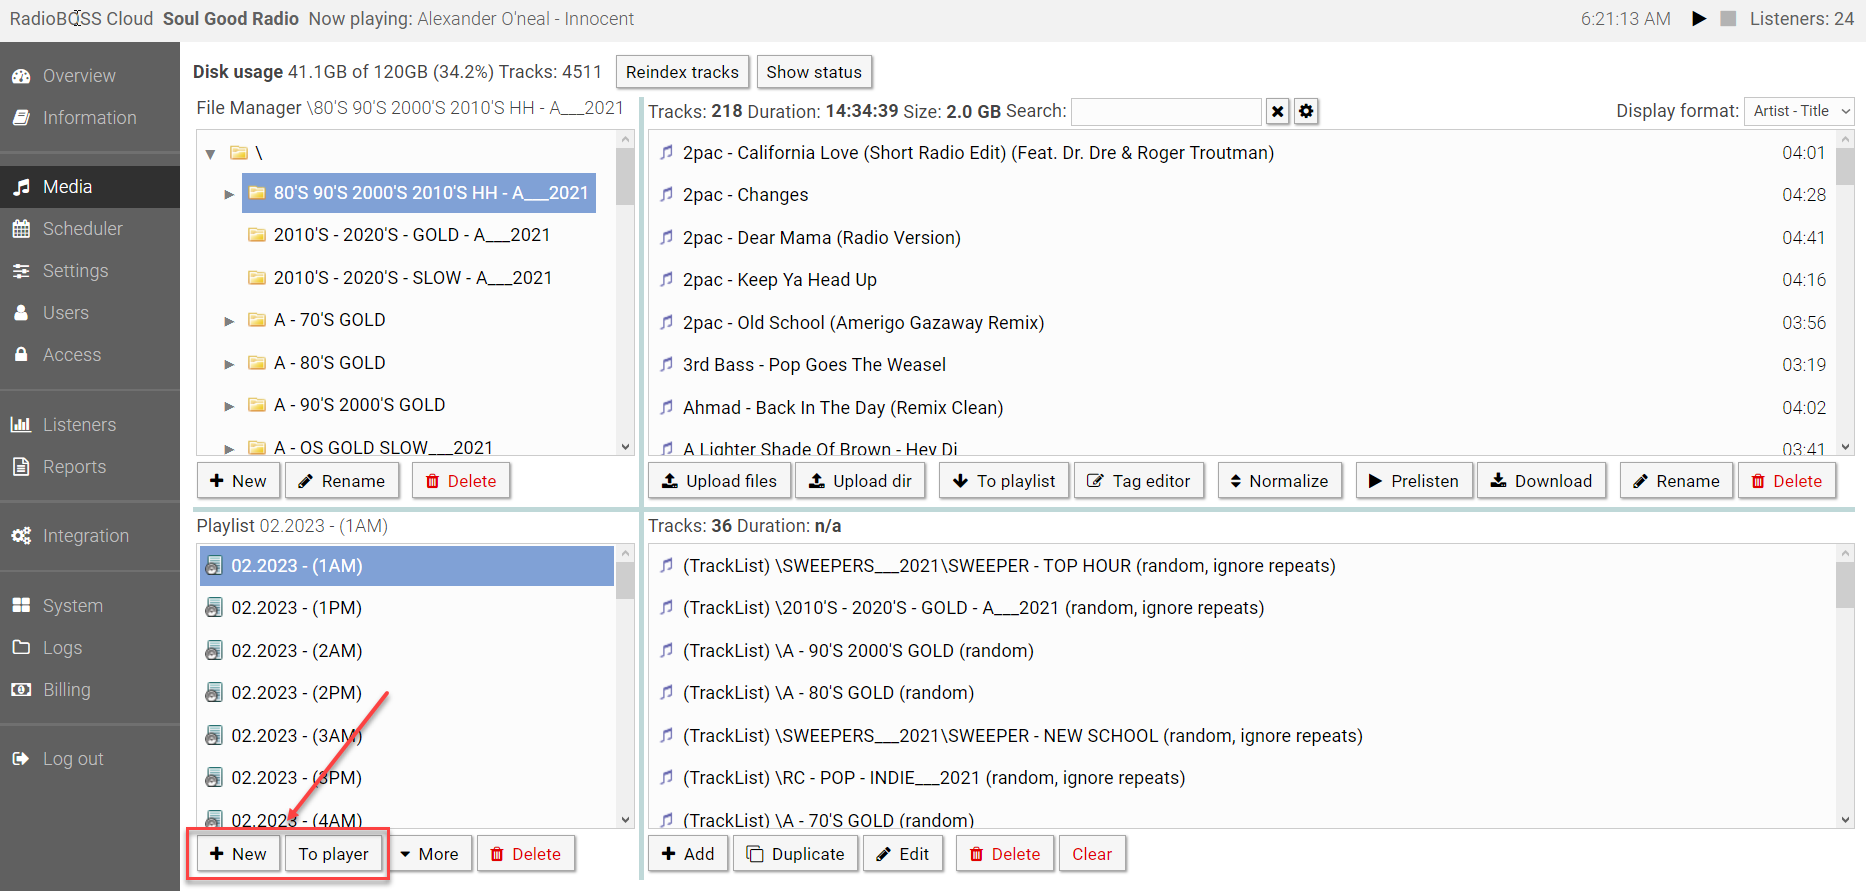
You can add one or more tracks directly to the playlist by dragging them with the mouse or using the “To Playlist” button. You can also select multiple tracks with the Ctrl or Shift keys.
Start playback
Make sure the playlist with the rotation is selected, click the “To player” button to send it to the player. This will load the rotation to the player. Open “Overview“, you should see that your playlist is loaded. Click the “Play” button to start playback.
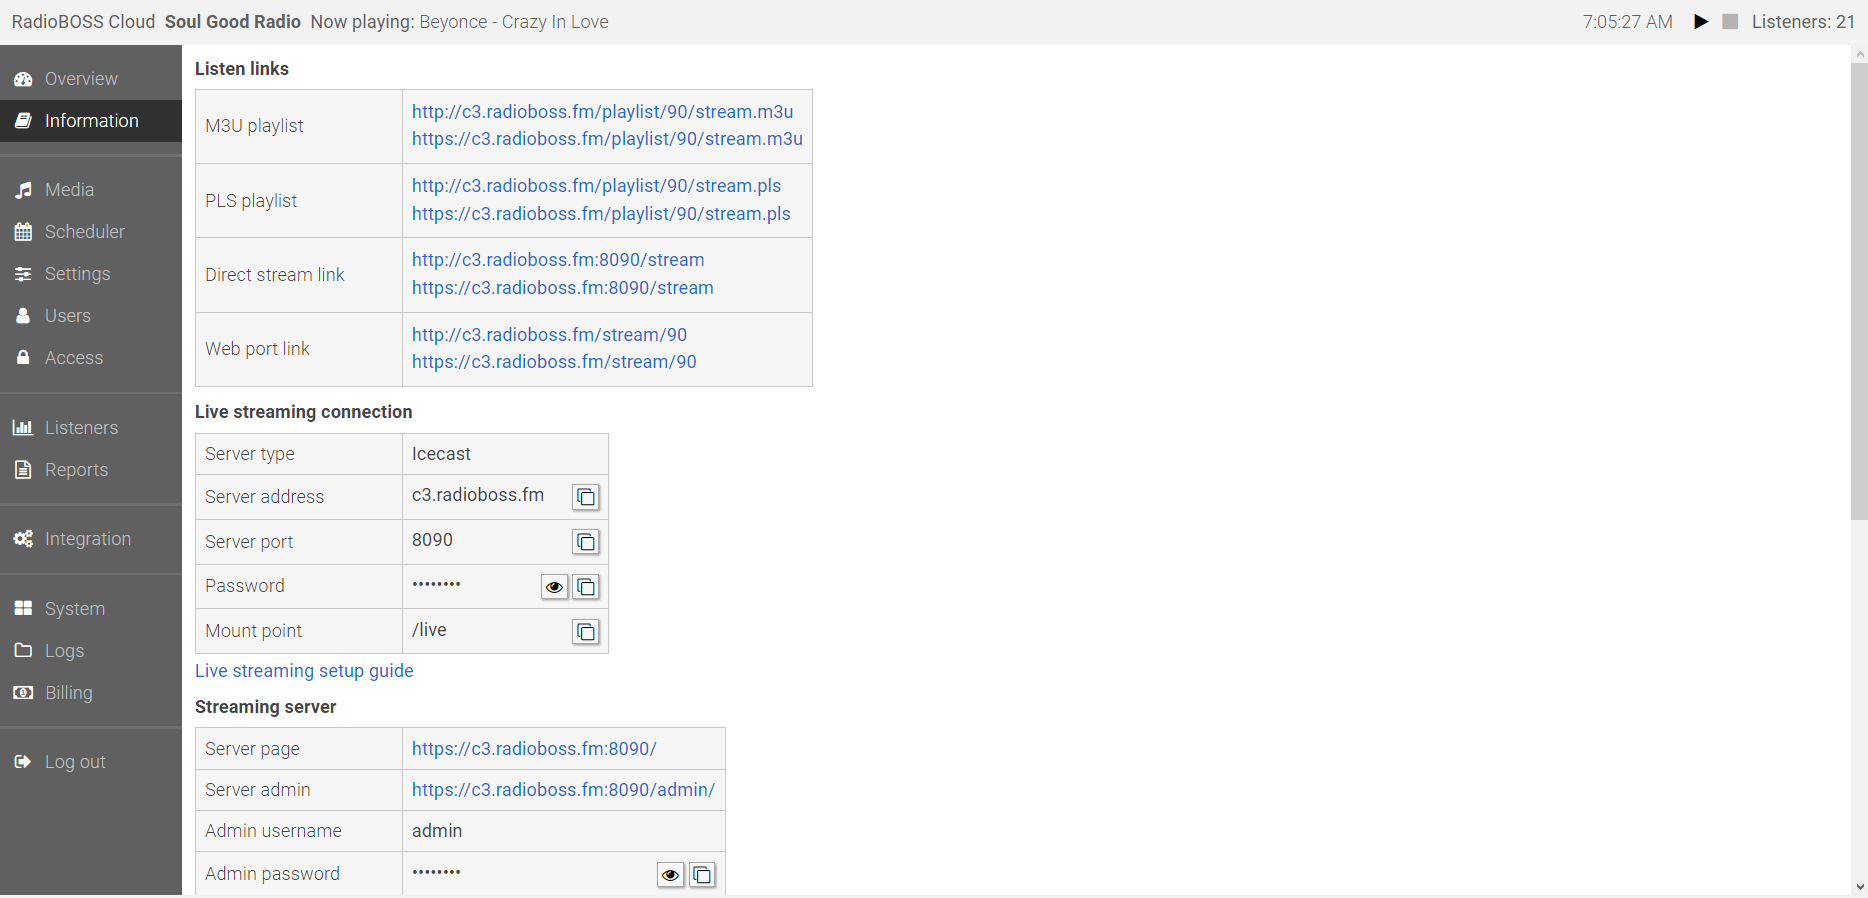
You can listen to your stream using the mini-player at the top right corner. The tune-in links are in the “Information” section.
4. Separation rules
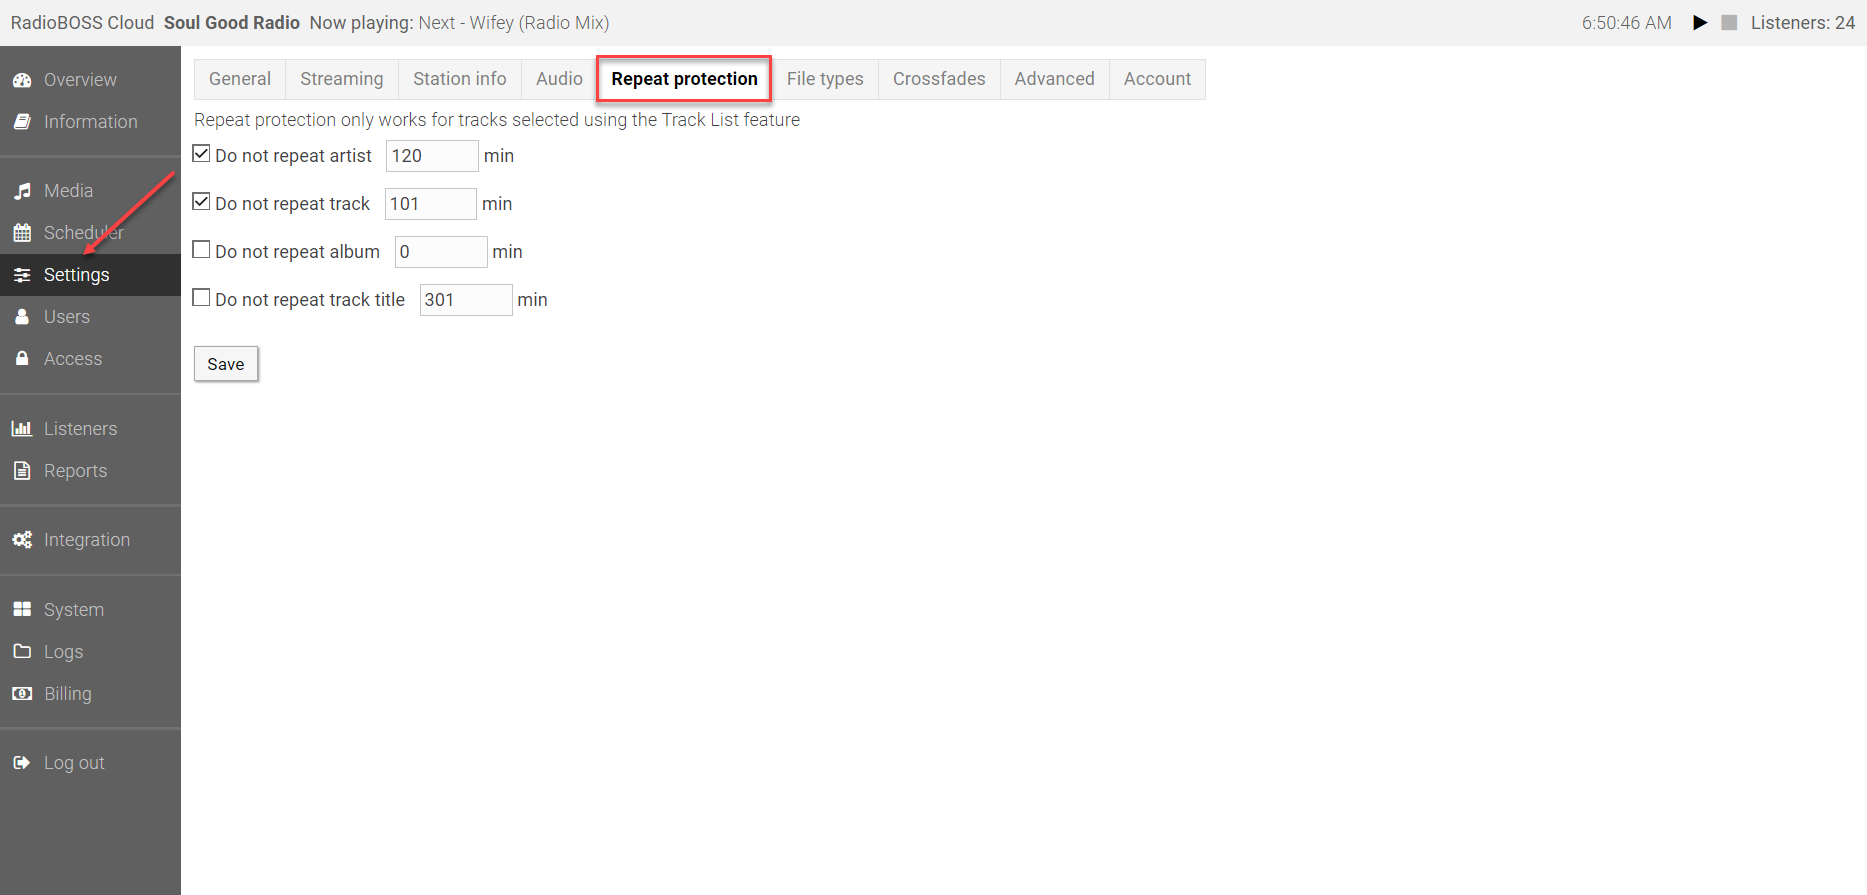
By default, RadioBOSS Cloud will use all tracks from the source (a folder), meaning no track repeats until all tracks have been played. But you may wish to have more than that, like, do not repeat artists or the same tracks within a set period of time.
To achieve that, open “Settings” and select “Repeat Protection” at the top. Set the rules according to your needs.
Please do not make the rules too strict: they can lead to errors when it’s unable to find a track that meets the criteria. You can check for errors by opening the “Logs“ section.
Click the “Save“ button to save settings.
5. Scheduler
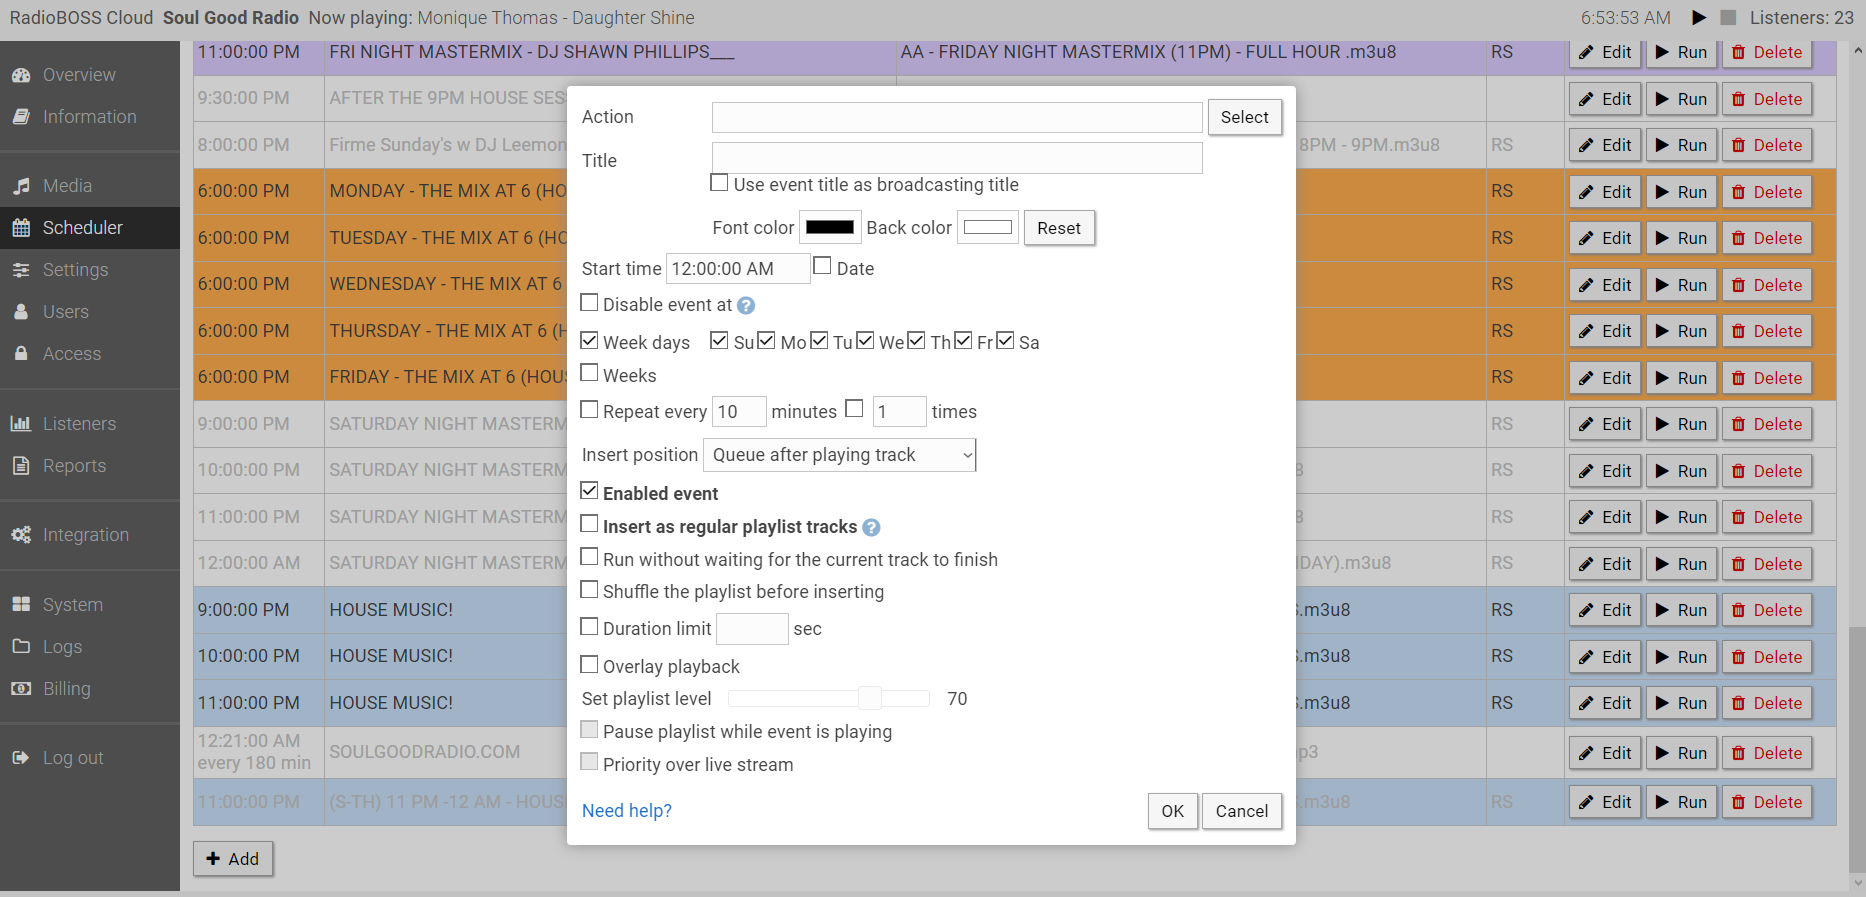
The scheduler can be used to switch between different rotations, start TOTH jingles, run adverts, etc. Click “Scheduler” to open it. For more information about the scheduler, please see the Scheduler guide.
6. Track types for station IDs and other special items
It is recommended that file types for special items like station IDs, commercials etc., be configured. This will prevent the display of titles for such tracks to listeners, exclude tracks from reports, mark them with color in the playlist, and use custom crossfade parameters.
7. Live broadcasting
You’ll need to use a streaming software that supports Icecast to perform a live broadcast. Please see the Live Streaming Guide for details on how to set up live streaming.